

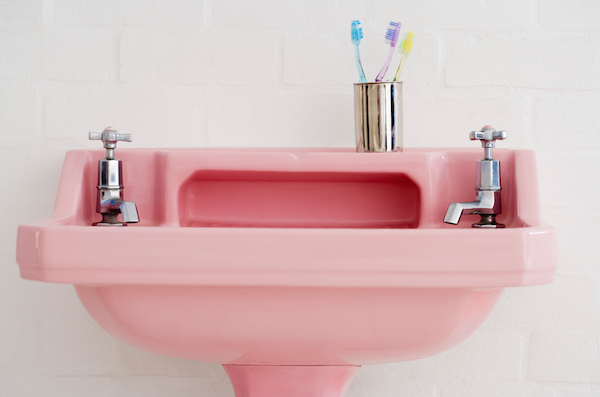
Bathroom sinks are commonly made of durable materials, capable of withstanding heavy daily use while keeping their visual appeal.
Still, after some time, they may start to lose their crisp appearance and start looking a bit faded, discolored, and stained.
At this point, no amount of cleaning can help anymore. For many homeowners, the first reaction is to replace the old sink and install a new one.
Of course, this often proves to be rather costly and sometimes you can’t even find a similar model of the sink that will fit your bathroom perfectly.
However, many of these sinks are still in good condition, apart from how they look.
Often, all they need is a quick facelift to the surface and a touch of fresh color to restore them to their original beauty.
This brings us to the question homeowners frequently ask: Can you paint a bathroom sink?
Can You Paint a Bathroom Sink?
The good news is that you can paint a bathroom sink and this is probably the most cost-effective way to breathe new life into your sink.
Of course, painting is an option only when there are no major damages to the sink, such as chips or cracks,
In these cases, it may be better to just replace it with a new sink.
Ideally, you would want your repainted sink to serve you at least a couple more years, which isn’t possible if there’s substantial damage.
Still, as most sinks are designed to last for a really long time, a simple visual makeover will most likely do the job.
Paint the sink can also help you redefine the whole bathroom area and make it look fresh and new.
While most people go with the same color as the original, you can opt for a different shade to liven up the bathroom space.
How to Paint a Bathroom Sink?
Painting the sink is not only an inexpensive refurbishing solution but also a fairly simple job. If you have any experience with handiwork, you will probably be able to do it yourself.
You can make it an interesting DIY project and even have some fun while doing it. Nevertheless, it’s rather time-consuming and does require some elbow grease.
Plus, there are several things you should pay attention to if you want the job done properly.
The process of painting a bathroom sink involves several steps which are all necessary to achieve the desired result.
To help out and make things a bit clear, I’ll take you through each of these steps.
Preparation
Before starting any painting work, you first have to properly prepare the sink and the area around it.
To make the whole process easier and ensure an even finish across the sink, you should remove the faucets or any other sink fixtures.
In addition, this way, you’ll make sure not to accidentally damage the stainless steel finish on the fixtures.
If there’s any excess caulking around the faucet holes, remove it with a razor blade or a scraping knife.
Then, to avoid the potential mess and additional cleaning, protect the entire bathroom area, especially around the sink, with painter’s tape and plastic sheeting.
This is particularly important if you plan on using spray paint.
To protect yourself from the paint fumes and avoid strong and unpleasant odors, make sure that the bathroom is well-ventilated, open the window, and turn on the ventilation fan if you have one.
Cleaning and Preparing the Sink Surface
Before applying paint, you’ll need to make sure that the sink surface is clean and as smooth as possible.
For the starter, rinse the sink and use bleach and hot water to get rid of any mildew off the surface. Make sure not to skip this step even if mildew is not visible to the naked eye.
The next step involves using one of the household abrasive cleaners to scrub any stubborn dirt or debris that may be stuck in the pores of the sink surface.
Avoid using particularly harsh abrasives, as they can damage the surface and do more damage than good.
Once done, rinse the sink with warm water and dry it thoroughly.
Finally, sand the sink with the 400- to 600-grit wet/dry sandpaper. Be thorough and try to remove as many imperfections as possible to ensure the smooth surface that the paint can adhere to.
Choosing the Paint
Once you’re done with the preparation, you can start the painting. The pain you will use will depend on the type of finish and color you want, but also on the material the sink is made of.
You should use the paint that is specifically designed for the type of sink you have. For example, the ceramic sink should only be painted with epoxy-based paint.
If you’re unsure how to find the best paint for bathroom sink, don’t be afraid to ask for advice at your local home improvement or paint store.
Painting
The paint should be applied carefully, evenly, and in thin coats. Depending on the type of paint, you’ll most likely need at least three or four coats to get the job done and achieve the nice-looking finish.
Even if it’s rather time-consuming, wait until one coat is fully dry before applying another.
Always check the label and instructions to ensure the job is done right. Some paints will require a primer to be applied first.
Commonly, the paint will take a couple of days to cure.
Only when this period is over, remove the protection form around the bathroom, reinstall the fixtures and recaulk any edges that were previously caulked.
The new coating will still be a bit sensitive and delicate, so take caution not to damage it.
Conclusion
Repainting the sink is a fantastic way to liven up your bathroom decor, make the sink itself look more appealing, and save some money in the process.
It’s also hygienic, as you will be getting rid of all the mildew and dirt that may have piled up over the years.
It will take some effort and a fair chunk of your time, but the end result will be similar to buying a new, beautiful sink.
The whole process will make your bathroom a more pleasant place to be in and probably improve the overall value of your property.


 Shookdeco.com is modern website that provides the best deals on Home Decor items & Keeps you updated through latest offers & Blogs. All images are copyrighted to their respective owners. All content cited is derived from their respective sources.